01—简介
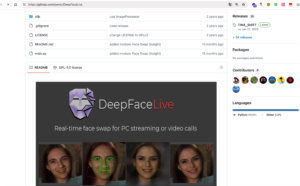
DeepFace是一个为Python设计的轻量级人脸检测、人脸识别和人脸属性分析框架,能够进行年龄、性别、情感以及种族的识别。这个库集成了多个先进的人脸识别模型,包括VGG-Face、Google FaceNet、OpenFace、Facebook DeepFace和DeepIDArcFaceDlib。DeepFace还具备人脸对齐的功能,这是为了提高识别准确性而设置的一步操作。通过对检测到的人脸进行对齐操作,可以消除姿态、光照和表情等因素对识别结果的影响。并且使用起来非常简单。
开源地址
https://github.com/serengil/deepface02—安装
为了防止跟其他项目环境冲突,我是创建个虚拟环境玩的,这部分不了解的可以忽略。反正一键安装就行
pip install deepfacepip install tf-keraspip install facenet-pytorch也可以源码安装
$ git clone https://github.com/serengil/deepface.git$ cd deepface$ pip install -e .03—使用
引入
from deepface import DeepFacedeepface功能非常丰富,常用的有人脸验证、人脸检测、人脸识别、人脸分析等,这些功能可以应用到图片或者视频流上面。下面将一一实验。
04—人脸验证
先定义两个变量,因为所有的deepface方法都接受可选的模型参数和对齐参数。
backends = [ 'opencv', 'ssd', 'dlib', 'mtcnn', 'fastmtcnn', 'retinaface', 'mediapipe', 'yolov8', 'yunet', 'centerface',]alignment_modes = [True, False]deepface 源码的tests/dataset目录下有大量图片,可以用于接口测试
![图片[1]-deepface:人脸检测、人脸识别、人脸验证笔记](https://xsx.tw/wp-content/uploads/2024/07/d2b5ca33bd20240713062738-1024x594.png)
调用人脸验证接口验证两张图片是否为同一个人
![图片[2]-deepface:人脸检测、人脸识别、人脸验证笔记](https://xsx.tw/wp-content/uploads/2024/07/d2b5ca33bd20240713062748.png)
![图片[3]-deepface:人脸检测、人脸识别、人脸验证笔记](https://xsx.tw/wp-content/uploads/2024/07/d2b5ca33bd20240713062754.png)
obj = DeepFace.verify( img1_path = "tests\dataset\img1.jpg", img2_path = "tests\dataset\img2.jpg", detector_backend = backends[0], align = alignment_modes[0],)verify接口参数说明:
img1_path: 第一张图片的路径。img2_path: 第二张图片的路径。model_name: 使用的人脸识别模型的名称,默认为"VGG-Face"。detector_backend: 使用的检测器后端的名称,默认为"opencv"。distance_metric: 用于计算相似度的度量方法,默认为"cosine"。enforce_detection: 是否强制检测人脸,默认为True。align: 是否对齐人脸,默认为True。normalization: 归一化方法,默认为"base"。输出内容如下
{ 'verified': True, 'distance': 0.412801693879869, 'threshold': 0.68, 'model': 'VGG-Face', 'detector_backend': 'opencv', 'similarity_metric': 'cosine', 'facial_areas': { 'img1': { 'x': 339, 'y': 218, 'w': 768, 'h': 768, 'left_eye': (850, 524), 'right_eye': (571, 517) }, 'img2': { 'x': 524, 'y': 201, 'w': 491, 'h': 491, 'left_eye': (858, 388), 'right_eye': (663, 390) } }, 'time': 2.27}返回值字段说明:
verified: 布尔值,表示两张图片是否属于同一个人。如果距离小于等于阈值,则返回True,否则返回False。distance: 浮点数,表示两张图片之间的距离。threshold: 浮点数,表示用于判断两张图片是否属于同一个人的阈值。model: 字符串,表示使用的人脸识别模型的名称。detector_backend: 字符串,表示使用的检测器后端的名称。similarity_metric: 字符串,表示用于计算相似度的度量方法。facial_areas: 字典,包含两个键值对,分别表示两张图片的人脸区域信息。键为"img1"和"img2",值为对应的人脸区域数据。time: 浮点数,表示执行该段代码所花费的时间,保留两位小数。05—人脸识别
Deepface是一个混合人脸识别 软件包。目前,它涵盖了许多最先进的人脸识别模型:VGG-Face、FaceNet、OpenFace、DeepFace、DeeplD、ArcFace、Dlib、SFace和Ghost FaceNet。默认的ses VGG-Face模型。
models = [ "VGG-Face", "Facenet", "Facenet512", "OpenFace", "DeepFace", "DeepID", "ArcFace", "Dlib", "SFace", "GhostFaceNet",]dfs = DeepFace.find( img_path = "img1.jpg", db_path = "E:\lfw-funneled\lfw_funneled", model_name = models[1],)find接口参数说明:
img_path:要查找的图像的路径。db_path:包含人脸数据库的文件夹路径。model_name:使用的人脸识别模型,默认为"VGG-Face"。distance_metric:用于计算相似度的距离度量方法,默认为"cosine"。enforce_detection:是否强制检测人脸,默认为True。detector_backend:用于检测人脸的后端,默认为"opencv"。align:是否对齐人脸,默认为True。normalization:归一化方法,默认为"base"。silent:是否在执行过程中保持静默,默认为False。接口返回值说明
identity:表示最相似图像的身份或标识。verified:表示是否找到了匹配的图像。如果为 True,则表示找到了匹配;如果为 False,则表示未找到匹配。distance:表示查询图像与找到的最相似图像之间的距离。这里图片库我用了LFW数据集,LFW数据集可以通过官网下载
http://vis-www.cs.umass.edu/lfw/也可以通过kaggle下载
https://www.kaggle.com/datasets/atulanandjha/lfwpeopleLFW数据集解压后目录如下,目录名表示姓名
![图片[4]-deepface:人脸检测、人脸识别、人脸验证笔记](https://xsx.tw/wp-content/uploads/2024/07/d2b5ca33bd20240713063025.png)
每个目录下面是图片
![图片[5]-deepface:人脸检测、人脸识别、人脸验证笔记](https://xsx.tw/wp-content/uploads/2024/07/d2b5ca33bd20240713063035.png)
第一次运行时执行时间较长,会在第二个参数指定目录下生成一个.pkl文件,后续检索1万3千张图片的库在我笔记本上能毫秒级响应。
![图片[6]-deepface:人脸检测、人脸识别、人脸验证笔记](https://xsx.tw/wp-content/uploads/2024/07/d2b5ca33bd20240713063043-1024x423.png)
06—人脸检测
人脸检测接口如下
接口参数有
img_path:输入图像的路径。target_size:目标大小,默认为(224, 224)。detector_backend:检测器后端,默认为"opencv"。enforce_detection:是否强制检测人脸,默认为True。align:是否对齐人脸,默认为True。grayscale:是否将图像转换为灰度图,默认为False。face_objs = DeepFace.extract_faces( img_path = "img.jpg", detector_backend = backends[4], align = alignment_modes[0],)接口输出的face_objs是一个列表,其中facial_area字段表示人脸在原始图像中的位置和大小,face字段表示提取的人脸图像,confidence字段表示人脸检测的置信度。
'facial_area': {'x': 1145, 'y': 802, 'w': 99, 'h': 127, 'left_eye': (1219, 856), 'right_eye': (1174, 855)}, 'confidence': 1.0}使用OpenCV读取一张图片,并显示
import cv2 as cvimg = cv.imread('C:\Users\DELL\Desktop\10.jpg',1)cv.imshow('image',img)![图片[7]-deepface:人脸检测、人脸识别、人脸验证笔记](https://xsx.tw/wp-content/uploads/2024/07/d2b5ca33bd20240713063159.png)
检测人脸,并使用OpenCV在检测到的区域画出矩形框
face_objs = DeepFace.extract_faces(img_path = img,detector_backend = backends[4],align = alignment_modes[0],)for item in face_objs: rect_img1 = item['facial_area'] cv.rectangle(img, (rect_img1["x"], rect_img1["y"]),(rect_img1["x"] + rect_img1["w"], rect_img1["y"] + rect_img1["h"]),(0, 255, 0),1)cv.imshow('image',img)![图片[8]-deepface:人脸检测、人脸识别、人脸验证笔记](https://xsx.tw/wp-content/uploads/2024/07/d2b5ca33bd20240713063218.png)
换一张更有挑战性的图片试试效果
![图片[9]-deepface:人脸检测、人脸识别、人脸验证笔记](https://xsx.tw/wp-content/uploads/2024/07/d2b5ca33bd20240713063230-1024x576.png)
img = cv.imread('C:\Users\DELL\Desktop\17.jpg',1)face_objs = DeepFace.extract_faces(img_path = img,detector_backend = backends[4],align = alignment_modes[0],)for item in face_objs: rect_img1 = item['facial_area'] cv.rectangle(img, (rect_img1["x"], rect_img1["y"]),(rect_img1["x"] + rect_img1["w"], rect_img1["y"] + rect_img1["h"]),(0, 255, 0),1)![图片[10]-deepface:人脸检测、人脸识别、人脸验证笔记](https://xsx.tw/wp-content/uploads/2024/07/d2b5ca33bd20240713063243-1024x576.png)
使用OpenCV和deepface实现视频数据的人脸检测,在人脸上画个框,将标注后的数据保存为一个新的视频
import numpy as npimport cv2 as cvfrom deepface import DeepFacebackends = [ 'opencv', 'ssd', 'dlib', 'mtcnn', 'fastmtcnn', 'retinaface', 'mediapipe', 'yolov8', 'yunet', 'centerface',]alignment_modes = [True, False]cap = cv.VideoCapture("C:\Users\DELL\Desktop\109.mp4")fourcc = cv.VideoWriter_fourcc(*'XVID')# 获取视频帧的宽度和高度frame_width = int(cap.get(cv.CAP_PROP_FRAME_WIDTH))frame_height = int(cap.get(cv.CAP_PROP_FRAME_HEIGHT))out = cv.VideoWriter('C:\Users\DELL\Desktop\output.mp4', fourcc, 20.0, (frame_width, frame_height))while cap.isOpened(): ret, frame = cap.read() if not ret: print("Can't receive frame (stream end?). Exiting ...") break face_objs = DeepFace.extract_faces(img_path=frame, detector_backend=backends[4], align=alignment_modes[0], enforce_detection=False) if face_objs: # 检查是否检测到人脸 for item in face_objs: rect_img1 = item['facial_area'] cv.rectangle(frame, (rect_img1["x"], rect_img1["y"]), (rect_img1["x"] + rect_img1["w"], rect_img1["y"] + rect_img1["h"]), (0, 255, 0), 2) out.write(frame)# 释放资源cap.release()out.release()cv.destroyAllWindows()07—人脸分析
人脸分析
demographies = DeepFace.analyze(img_path = "C:\Users\DELL\Desktop\10.jpg", detector_backend = backends[3],align = alignment_modes[0],)接口参数说明:
img_path:图像文件的路径。
actions:一个元组,包含要分析的属性名称。默认值为(“emotion”, “age”, “gender”, “race”)。
enforce_detection:布尔值,表示是否强制检测人脸。默认值为True。
detector_backend:字符串,表示用于检测人脸的后端库。默认值为”opencv”。
align:布尔值,表示是否对齐人脸。默认值为True。
silent:布尔值,表示是否在执行过程中保持静默。默认值为False。
接口返回内容格式如下:
[{ 'emotion': { 'angry': 1.4466323820729483, 'disgust': 0.00025223909372538517, 'fear': 8.167791108357376, 'happy': 10.1797743248805, 'sad': 8.78719739837631, 'surprise': 15.690904300862806, 'neutral': 55.72744940086898 }, 'dominant_emotion': 'neutral', 'region': { 'x': 97, 'y': 219, 'w': 48, 'h': 61, 'left_eye': (134, 246), 'right_eye': (112, 242) }, 'face_confidence': 1.0, 'age': 31, 'gender': { 'Woman': 0.4522365052253008, 'Man': 99.54776167869568 }, 'dominant_gender': 'Man', 'race': { 'asian': 0.8222794111335979, 'indian': 1.1370807461940353, 'black': 97.618639753027, 'white': 0.010547150502647026, 'middle eastern': 0.006969492721049983, 'latino hispanic': 0.4044788873071805 }, 'dominant_race': 'black'}]返回内容字段含义
"region":人脸在图像中的位置和大小,包括x坐标、y坐标、宽度和高度。"age":人脸的年龄预测值。"dominant_gender":人脸的主要性别,可能是"Woman"(女性)或"Man"(男性)。"gender":一个字典,包含了各个性别的概率。"dominant_emotion":人脸的主要情绪,可能是"neutral"(中性)、"sad"(悲伤)、"angry"(愤怒)、"surprise"(惊讶)、"fear"(恐惧)、"happy"(快乐)或"disgust"(厌恶)。"emotion":一个字典,包含了各个情绪的概率。"dominant_race":人脸的主要种族,可能是"indian"(印度裔)、"asian"(亚裔)、"latino hispanic"(拉丁裔西班牙裔)、"black"(黑人)、"middle eastern"(中东裔)或"white"(白人)。"race":一个字典,包含了各个种族的概率。来一个完整例子
import numpy as npimport cv2 as cvfrom deepface import DeepFacebackends = [ 'opencv', 'ssd', 'dlib', 'mtcnn', 'fastmtcnn', 'retinaface', 'mediapipe', 'yolov8', 'yunet', 'centerface',]alignment_modes = [True, False]font = cv.FONT_HERSHEY_SIMPLEXimg = cv.imread('C:\Users\DELL\Desktop\10.jpg',1)demographies = DeepFace.analyze(img_path = img, detector_backend = backends[3],align = alignment_modes[0],) for item in demographies: dominant_emotion = str(item['dominant_emotion']) rect_img1 = item['region'] age = str(item['age']) dominant_gender = str(item['dominant_gender']) dominant_race = str(item['dominant_race']) cv.rectangle(img, (rect_img1["x"], rect_img1["y"]),(rect_img1["x"] + rect_img1["w"], rect_img1["y"] + rect_img1["h"]),(0, 255, 0),2) cv.putText(img,dominant_emotion,(rect_img1["x"], rect_img1["y"]-1), font, 1,(0,255,0),2,cv.LINE_AA) cv.putText(img,age,(rect_img1["x"], rect_img1["y"] + rect_img1["h"] + 25), font, 1,(0,255,0),2,cv.LINE_AA) cv.putText(img,dominant_gender,(rect_img1["x"], rect_img1["y"] + rect_img1["h"] + 55), font, 1,(0,255,0),1,cv.LINE_AA)cv.imwrite('C:\Users\DELL\Desktop\11.png',img)![图片[11]-deepface:人脸检测、人脸识别、人脸验证笔记](https://xsx.tw/wp-content/uploads/2024/07/d2b5ca33bd20240713063456.png)


暂无评论内容